
This article will teach you how to airbrush clothing, outlining how to use an airbrush for this purpose. You’ll learn how the process works and how it provides a great way to customize your own clothing with artwork or logos of your choice. We’ll also explore some tips on how to get the best results possible when airbrushing clothes.
Supplies and Materials
Anyone who wants to airbrush clothing needs to have the proper supplies and materials. You will need an airbrush, compressor, and hoses to get started. You will also need paints, a paint palette, and a way to hold the fabric taut while you’re painting it. Finally, you’ll need some way to clean your equipment when you’re finished.
Airbrush
There are several different airbrush kits available to airbrush clothing, the most popular of which is the siphon-feed airbrush. The siphon-feed airbrush is perfect for t-shirts because it effortlessly handles the thicker viscosity textile paint that you’ll need.
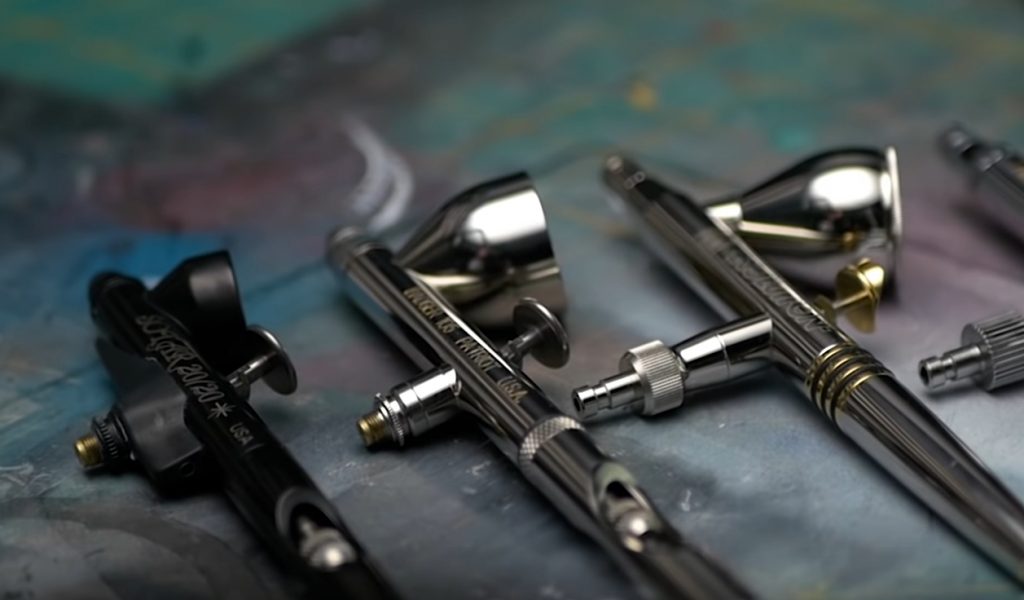
When spraying t-shirts, I love these. They’re also great for fast color changes, particularly useful when airbrushing t-shirts. The greatest thing to do is to use separate bottles for each hue, allowing you to quickly alter colors. An airbrush holder may be used to keep your airbrush upright while not in use.
Airbrush Compressor

The ideal compressor should have a working pressure of 40-60 psi. As a result, you will get an even flow of air. If you’re airbrushing a few t-shirts for fun, any primary air compressor will suffice. However, if you’re going to be airbrushing many t-shirts, we recommend investing in a commercial compressor from a store like Sears, Home Depot, or Lowes.
Paint with an Airbrush
If you don’t want your paint to wash away or wish your airbrushed artwork to endure, it’s essential to utilize the correct color. It is critical to use the proper paint since it protects the painting from fading and assures long-term outcomes. Once you’ve finished airbrushing, most of these paints must be heated for the design or pattern to become permanent on the T-shirt.
If you apply GAC 900 before airbrushing, you’ll reduce the surface’s overall fuzziness, which is prone to catching a lot of oversprays. After two applications of GAC 900, try heating setting it according to the manufacturer’s instructions.
Rest assured that you will be left with a very smooth surface to work on. This preliminary operation may not be required if you only create a basic shape. If you’re making a more complicated drawing, though, it’s worth taking the time and effort to do this final step.
T-Shirts
Obviously, you’ll need T-shirts. You may use a 100% cotton or a 50/50 blend T-shirt, both of which will be perfect for airbrushing. Using a 50/50 mix garment produces far less shrinkage and fades more minor over time. Before airbrushing your design, you do not have to wash your T-shirt.
How to Make an Airbrush T-Shirt on Your Own
Airbrushing a T-shirt or garment might be difficult for novices. We’ve included step-by-step instructions on how to airbrush a T-shirt.
Cleaning and Preparing the Airbrush Stencil
The great news about using an airbrushing T-shirt stencil is that it eliminates the risk of obtaining extra paint on your t-shirt. The ideal material to make an airbrushing T-shirt stencil is pennant felt. This is especially significant if you intend to frequently utilize the airbrushing t-shirt stencil. Pennant felt is a low-cost material that can be used many times without cleaning it between uses.
You can also use different materials like cardstock, photo paper, or even freezer paper, but

Choose a design. When it comes to choosing a design, there are many alternatives. Another alternative is to draw your own creation, attempt to create a shape on the digital imaging software or just utilize a pre-made one.
- The most straightforward option is to utilize a pre-made stencil. On the other hand, this method limits you to a small number of designs.
- When applying a digital design, be sure to print it out first. Use a high-quality paper for the best results.
- When deciding to draw your design by hand, keep in mind that you’re using thick paper for sketching and shouldn’t merely ink your stencil material.
Now it’s time to move the design over to the pennant felt. Although you use one of the above methods, your next step would be to place the design on a piece of banner felt. After that, using a pencil, trace the design onto the felt.
- If you want to use a pre-made stencil, simply trace the design without additional work.
- The cheap and easy way to make sure your pictures are hanging correctly is to choose a concept that is approximately the right size, place it where you want it, then paint over all of the complex parts. Once your images have been printed and matted, they should be hung in their own frames. Any paint splatters will be absorbed by the paper itself; as a result, this paper is an excellent material for painting over any other paint. In addition, it is highly robust.
- If you’re using a photo from your own collection, you’ll have to remove the traced lines to make a temporary stencil. You may then trace over the felt with this.
Carefully cut out the stencil. After you’ve completed the preceding procedures, place a cutting mat under the pennant felt and carefully cut along the lines you’ve drawn. Remove any remaining scraps of material, and your stencil is finished.
For most patterns, you can simply cut with a hobby knife or a utility knife. If you’re doing a more complicated design, we recommend using a stenciling device.
The temporary adhesive may be applied as a fine coat. It’s crucial to spray the glue over the stencil’s reverse.
- What You’ll Need: Ensure that the spray adhesive has had time to dry before proceeding to the next stage for optimum results. When you remove the stencil, any excess glue will be prevented from remaining on the T-shirt.
- The adhesive can keep the T-shirt in place. However, it is critical to utilize a repositionable or temporary adhesive. It’s crucial to avoid using any permanent glue.
After that, place the stencil where you want the design to be. You may then position the stencil where you wish, ensuring that the adhesive side is down on the T-shirt. To ensure that the stencil adheres to the T-shirt, press firmly.
- Paint tape, not masking tape, should be used to keep the stencil’s edges secure. This will protect the exposed surface of the T-shirt from any over-spray and ensure that the stencil is stable.
- After a few moments, double-check to ensure the stencil is firmly secured.
The Spraying Technique
When you’re ready to hang the T-shirt on an easel, first insert a T-shirt board within the T-shirt.
- To avoid paint seeping into the other side of the T-shirt, bounce it using a weighted ball.
- Hardboard, foam board, and Masonite are the most common materials used to make T-shirt boards.
- Check if you have enough space and do not have any restrictions. Make sure you can move about freely and set up the easel efficiently. Our experts say the shirt should be held at least 32 inches (81 cm) above the ground.
Hold the airbrush over the garment. We recommend beginning at the edges of the design rather than in the middle. You must hold the airbrush over the stencil.
- When airbrushing a T-shirt, you may produce many different effects depending on how near or far away from the garment you hold the airbrush pen. You’ll need to keep the airbrush at least 6 inches (15 cm) distant from the fabric if you want to create a smoother finish. However, to get a more intense result, you must keep the airbrush approximately 4 inches (10 cm) away from the cloth.
Paint in large, overlapping circles all over the surface. Press on the airbrush’s trigger to discharge the paint using a light touch. You may then apply paint with your hand to cover any exposed cloth.
- Remember to incorporate an overlapping movement to ensure no blank areas have been missed. For a more smooth and even appearance, use this method.
- You can tell if you’re getting a good seal around the surface of your work by carefully examining it. Keep in mind that you should ease the pressure on the trigger if you move the airbrush too close to the material. You will thus use less paint as a result of this.
- Keeping your hand in a steady motion is critical when working across the whole surface. If you do not do this, blobs of paint will form at the start and conclusion of each stroke.
You can also change the colors as needed. When you want to replace the color you’re using, let go of the trigger to stop the paint flow. You may then remove the container you utilize and attach the one for the next color you desire.
- Some airbrush users use different airbrushes for each color, but this is an expensive option. If you’re using a bottom-fed airbrush, simply changing the hues is ideal.
Remove the stencil gently. You can remove the stencil after you’ve finished painting on the T-shirt’s stencil portion.

- If you’re having trouble lifting the stencil, wait for the paint to fully dry before attempting again. The color will be less likely to smear and damage your entire design if you do this.
- Keep in mind that any tape you’ve applied to the stencil’s edges must be removed before attempting to remove it.
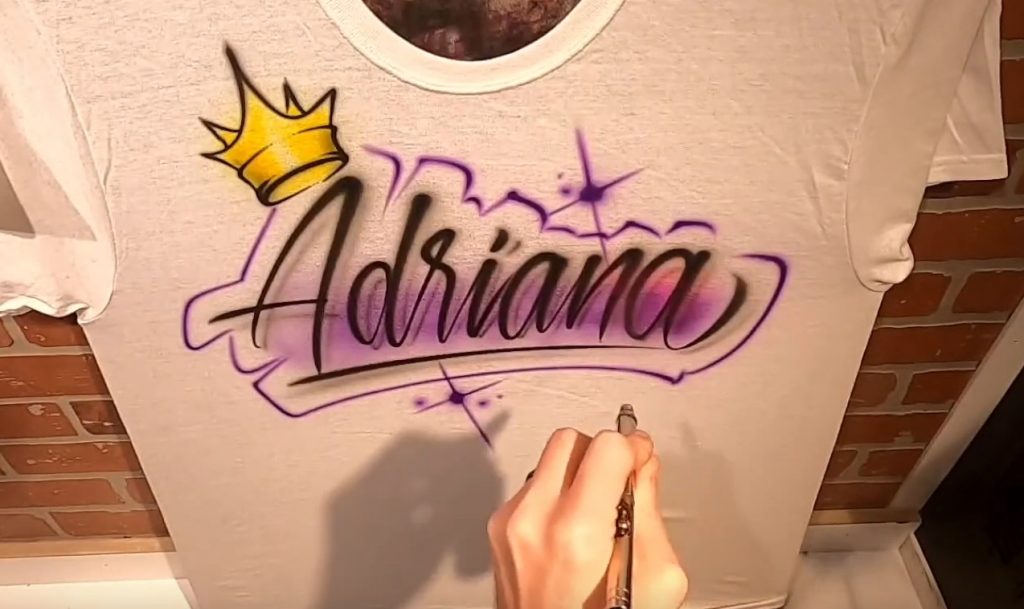
Add any freehand designs you want. This is your opportunity to add any personalized touches to your design. Keep in mind where you want to place your additional freehand design since you will not be able to return any mistakes.
- It’s a good idea to practice freehand design on a T-shirt before you print them on there. Letters and numbers are two examples of feasible freehand designs.
Finishing the Painted Surface
Allow the paint to dry. Before you seal it using heat pressing, make sure that the color has had enough time to dry.
- The amount of time it takes to dry varies depending on the brand of paint you’ve chosen. It is a good idea to wait at least 30 minutes. To determine whether the paint has dried, lightly touch it with your fingers. Nothing should come away from the surface, and it shouldn’t be sticky when connected with them.
Cover the T-shirt with parchment paper. You can test the paint’s driedness after you’re confident it’s dry by putting the T-shirt on a hard, flat surface. A sheet of parchment paper (or brown craft paper) must then be used to completely cover the design.
- Always keep the T-shirt in a protective covering, such as paper towels or brown craft paper. If you apply heat to the material directly without any protection, the paint might peel away from it.
- If you don’t have any parchment paper or brown craft paper, simply turn the T-shirt inside out and iron on the reverse of the design.
- It’s critical to make sure the surface is level and smooth before beginning.
Allow the design to cool entirely before ironing it. Preheat the iron to the “cotton” setting. You may then carefully press the iron over the entire procedure for about two minutes once it has heated up.
- Allow the iron to preheat for at least 10 minutes beforehand.
- You’ll be applying the paint to the airbrushed T-shirt rather than on top of it, which will keep it from washing out.
Heat setting a design is not the only option. These are some of the many alternatives:
- Or, use a heat gun to carefully melt the glue. Using a heat gun and rotating it over the surface for 30 seconds should also work.
- You can use a professional conveyor. You’ll need to raise the temperature to 120 degrees Fahrenheit (50 degrees Celsius), and it’ll take you 20 minutes to complete.
- Another option is a heat press. If you’re using a heat press, make sure it’s set to 375 degrees Fahrenheit (190 degrees Celsius) for 30 seconds.
You may then wash the T-shirt in cold water after it has cooled. Remember to use a mild detergent. You can air-dry your airbrushed T-shirt on a low heat setting, or you can tumble dry it.
How to Care for Your Painted Clothes After they’ve Been Air Brushed
If you’re like most people, you probably don’t think about taking care of your clothes until they start to look a little faded and worn. But if you’ve just had a new airbrush design put on your favorite shirt, it’s essential to take some extra steps to make sure the paint lasts as long as possible. Here are four tips for keeping your painted clothes looking great:
- Avoid the dryer! If you’re just hanging up your clothes to air-dry, that’s fine. But if you have a clothing line or drying rack in your home and plan on using it for these items, skip this step. The paint needs time to set correctly, so putting them through any extra movement could cause them to come off when they shouldn’t.
- Don’t wash with harsh detergents. Avoid using bleach or other mighty cleaners when washing painted garments by hand (or even using a delicate cycle). These can react negatively with some of the dyes used in most paints and strip away a color from areas with no paint – like white shirts under black designs. Again, this is not a problem if you’re just hanging them up to dry or air drying.
- Avoid excessive sunlight Exposing your clothes to intense direct light can fade both the paint and the fabric itself, so keep these items out of places like closets with windows that face east, west, or south – especially in summer months when UV rays are strongest. If possible, store garments to be kept away from strong light sources. You may want to consider investing in quality storage bags specifically designed for this purpose.
FAQs about Airbrush Clothing
Why would you want to airbrush clothing?
Airbrushing clothing can be a great way to improve the appearance of an item of clothing, making it look new and fresh. It can also cover up any stains or damage that may have occurred on the fabric. Additionally, airbrushing can add unique designs and patterns to clothing, making it stand out from the rest.
How do you know if your clothes are the right size for airbrushing
When airbrushing clothing, it is vital to make sure that the clothes are the correct size. If the clothes are too small, you will not be able to fit the airbrush in between the fabric and the body of the garment. If the clothes are too large, they may move around while you are trying to airbrush them, which can cause uneven results. To get the best results, it is crucial to make sure that your clothes are of a comfortable size for you.
What kind of paint should I use, and how much do I need for my project
There are many different types of paint, but you should use acrylics for airbrushing. You can find them in artist supply stores or online at Amazon. Acrylics work well because they’re very versatile and have a variety of finishes to choose from. They also dry quickly so your artwork can be touched up without smudging the wet paint on top of it. Some people prefer watercolors instead of acrylics because they are more transparent and blendable. If you want to make it look like it was painted, use watercolors to create softer lines when blending colors with a brush or sponge applicator.
Thanks for the post!
What kind of paint do you use to airbrush clothes?
For fabric paint, you will want to find a textile medium. There are many different brands of fabric medium, and they can be found in most art stores. The fabric medium will help the paint to adhere better to the fabric and will make the paint less likely to crack or peel.